This is an old revision of the document!
Using WeatherDuino Pro2 PLUS to upload data to a website database with SQL
By PalmyWeather
Using WeatherDuino Pro2 PLUS to upload data to a website database with SQL
(Available in Receiver Software Release v6.x onwards)
A Brief “How To” Guide. Please note that this is not a “one for all” guide, settings may be different depending on your server.
Step 1: Set up the database on the web server
- Log into your website’s control panel.
- Navigate to “MySQL® Databases” on your server.
- Create a new database if you have not already got one you would like to add to.
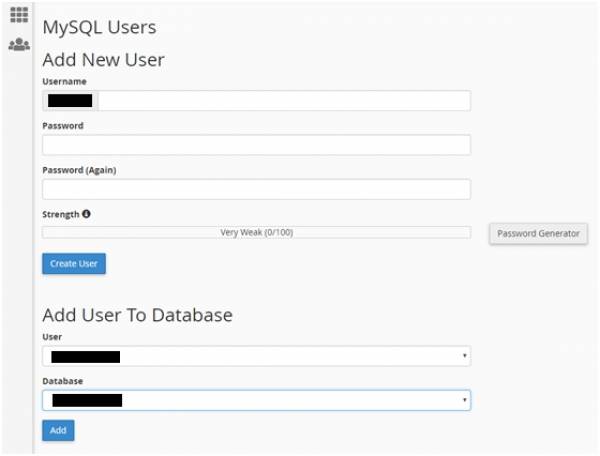
- Navigate to “MySQL® Users”, usually found as part of the “MySQL® Databases” settings.
- Create a new user if you do not already have one set up.
- Create a user name
- Create a password
- Select the database you would like that new user to be associated with.

Step 2: Enable remote control (This step may not be required)
For security, by default the web server will be protecting itself from remote unauthorised access which could modify or damage the data. Permission may need to be granted to allow your IP address assigned by your internet provider to write to your databases remotely if you host is not local.
- Using Google, search “What is my IP address?” and it will typically return with your IP address assigned by your internet provider. Note this number which should be 4 groups of numbers separated by decimal points. EG: XXX.XXX.XXX.XXX .
- From your server’s control panel, navigate to “Remote MySQL®”.
- Enter your IP address into the “Add Access Host” and save it to the list.